
MyCD.ca
![]() [
[
![]() ]
]
![]()
![]()
![]()
![]()
![]()
The page you are on is shown in brackets. [ Recording ]
1) MIXING A SONG ON A HARD DISK RECORDER by Art Rock MyCD.ca
2) RECORDING YOUR SONGS by Art Rock MyCD.ca
NEW 3] Synchronizing Two Multitrack Recorders to Double your Tracks by Art Rock MyCD
NEW - 4] 432Hz vs 440Hz IS THERE REALLY A DIFFERENCE? by Art Rock MyCD
NEW - 5] HOW DO I GET MY SONGS MASTERED by Art Rock MyCD
NEW - 6] CAN I DO MY OWN MASTERING? YOU ASK by Art Rock MyCD
7] Music Production and Mixing Tips & Tricks by Ian Waugh
8] Studio Singing & Vocal Technique By Tom Gauger
9] Preparing For Your Recording Session by John McKay
10] Tips for a Great Recording Session by Richard Dolmat
11] The 5 Most Common Questions About Music Mastering by masteringcentral .com
--------------------------------------------------------------------------------------- ----
| PLACE YOUR AD HERE contact: web @ mycd.ca |
Is a hard disk recorder easier to use than music recording software on a computer you ask. Yes it is, for the most part.
Mixing a song on a hard disk recorder is simpler and less confusing then it is to mix a song on computer music recording
software. On hard disk recorders you normally have a mixing console built in, usually right on the exterior top of the
recorder. They usually have an individual volume level fader and panning knob on each channel, right out in the open,
easy to grab and tweak. Some units even have EQ setting adjustment knobs right on the recording console as well.
Level, panning and EQ are some of the most important steps in recording your song, mixing down your song and
mastering your song. They really are mandatory steps you have to perform. Having these most used controls on the
exterior recording console of the hard disk recorder, makes it easier to use, than dialling in and cursoring left right
and up and down, on each individual track. Tweaking EQ can easily occupy the majority of your time in mixing a song.
Most hard disk recorders also have a very large selection of built in effects. With most units you can add different effects
individually on each track while recording your parts. You can then add different effects again on each track on mix down.
Most hard disk recorders have built in effect send buses, where you can add reverb and delay to all your tracks when you
master the mix. Normally you can adjust from zero to 100 percent wet effect applied on each track independently. Most
hard disk recorders also have built in mic preamps on each input channel. Most have guitar amp simulators so you can
plug your guitar directly into the recorder without an amp. The other people in your household and your neighbours may
appreciate that feature more than you. Having the ability to record, mix and master the song entirely in the digital domain
has the huge advantage of keeping background noise and ground effect noise to a minimum. Any time you use external
effects and gear you always increase the chance of adding noise to your mix, although quite often, the trade off is worth it.
All of the features mentioned here are also available on computer software recording and more. You can get a much larger
library of effects, while remaining in the digital domain, on recording software by adding plug-ins. There is no limit to how
much you can add except for how much you are willing to spend. Either way, hard disk recording, or computer based
recording, you can add on external hardware, such as direct boxes, input strips, mic preamps, effect units etc.
by Art Rock / MyCD.ca copyright Absolute Music
-------------------------------------------------------------------
JUST RELEASED
MAY 8th

-------------------------------------------------------------------
Why is it Free and how you can support us. All the articles and info we provide is completely free to you. We get very small payments from the advertisers on our website when you make a purchase from them, after clicking one of their ads on our site such as Amazon, Ebay, Walmart etc. You won't pay any extra for your purchase and you will help us keep it free. We also get a very small payment when you click on an adsense by Google ad
------------------------------------------------
FENDER AMERICAN PRO II
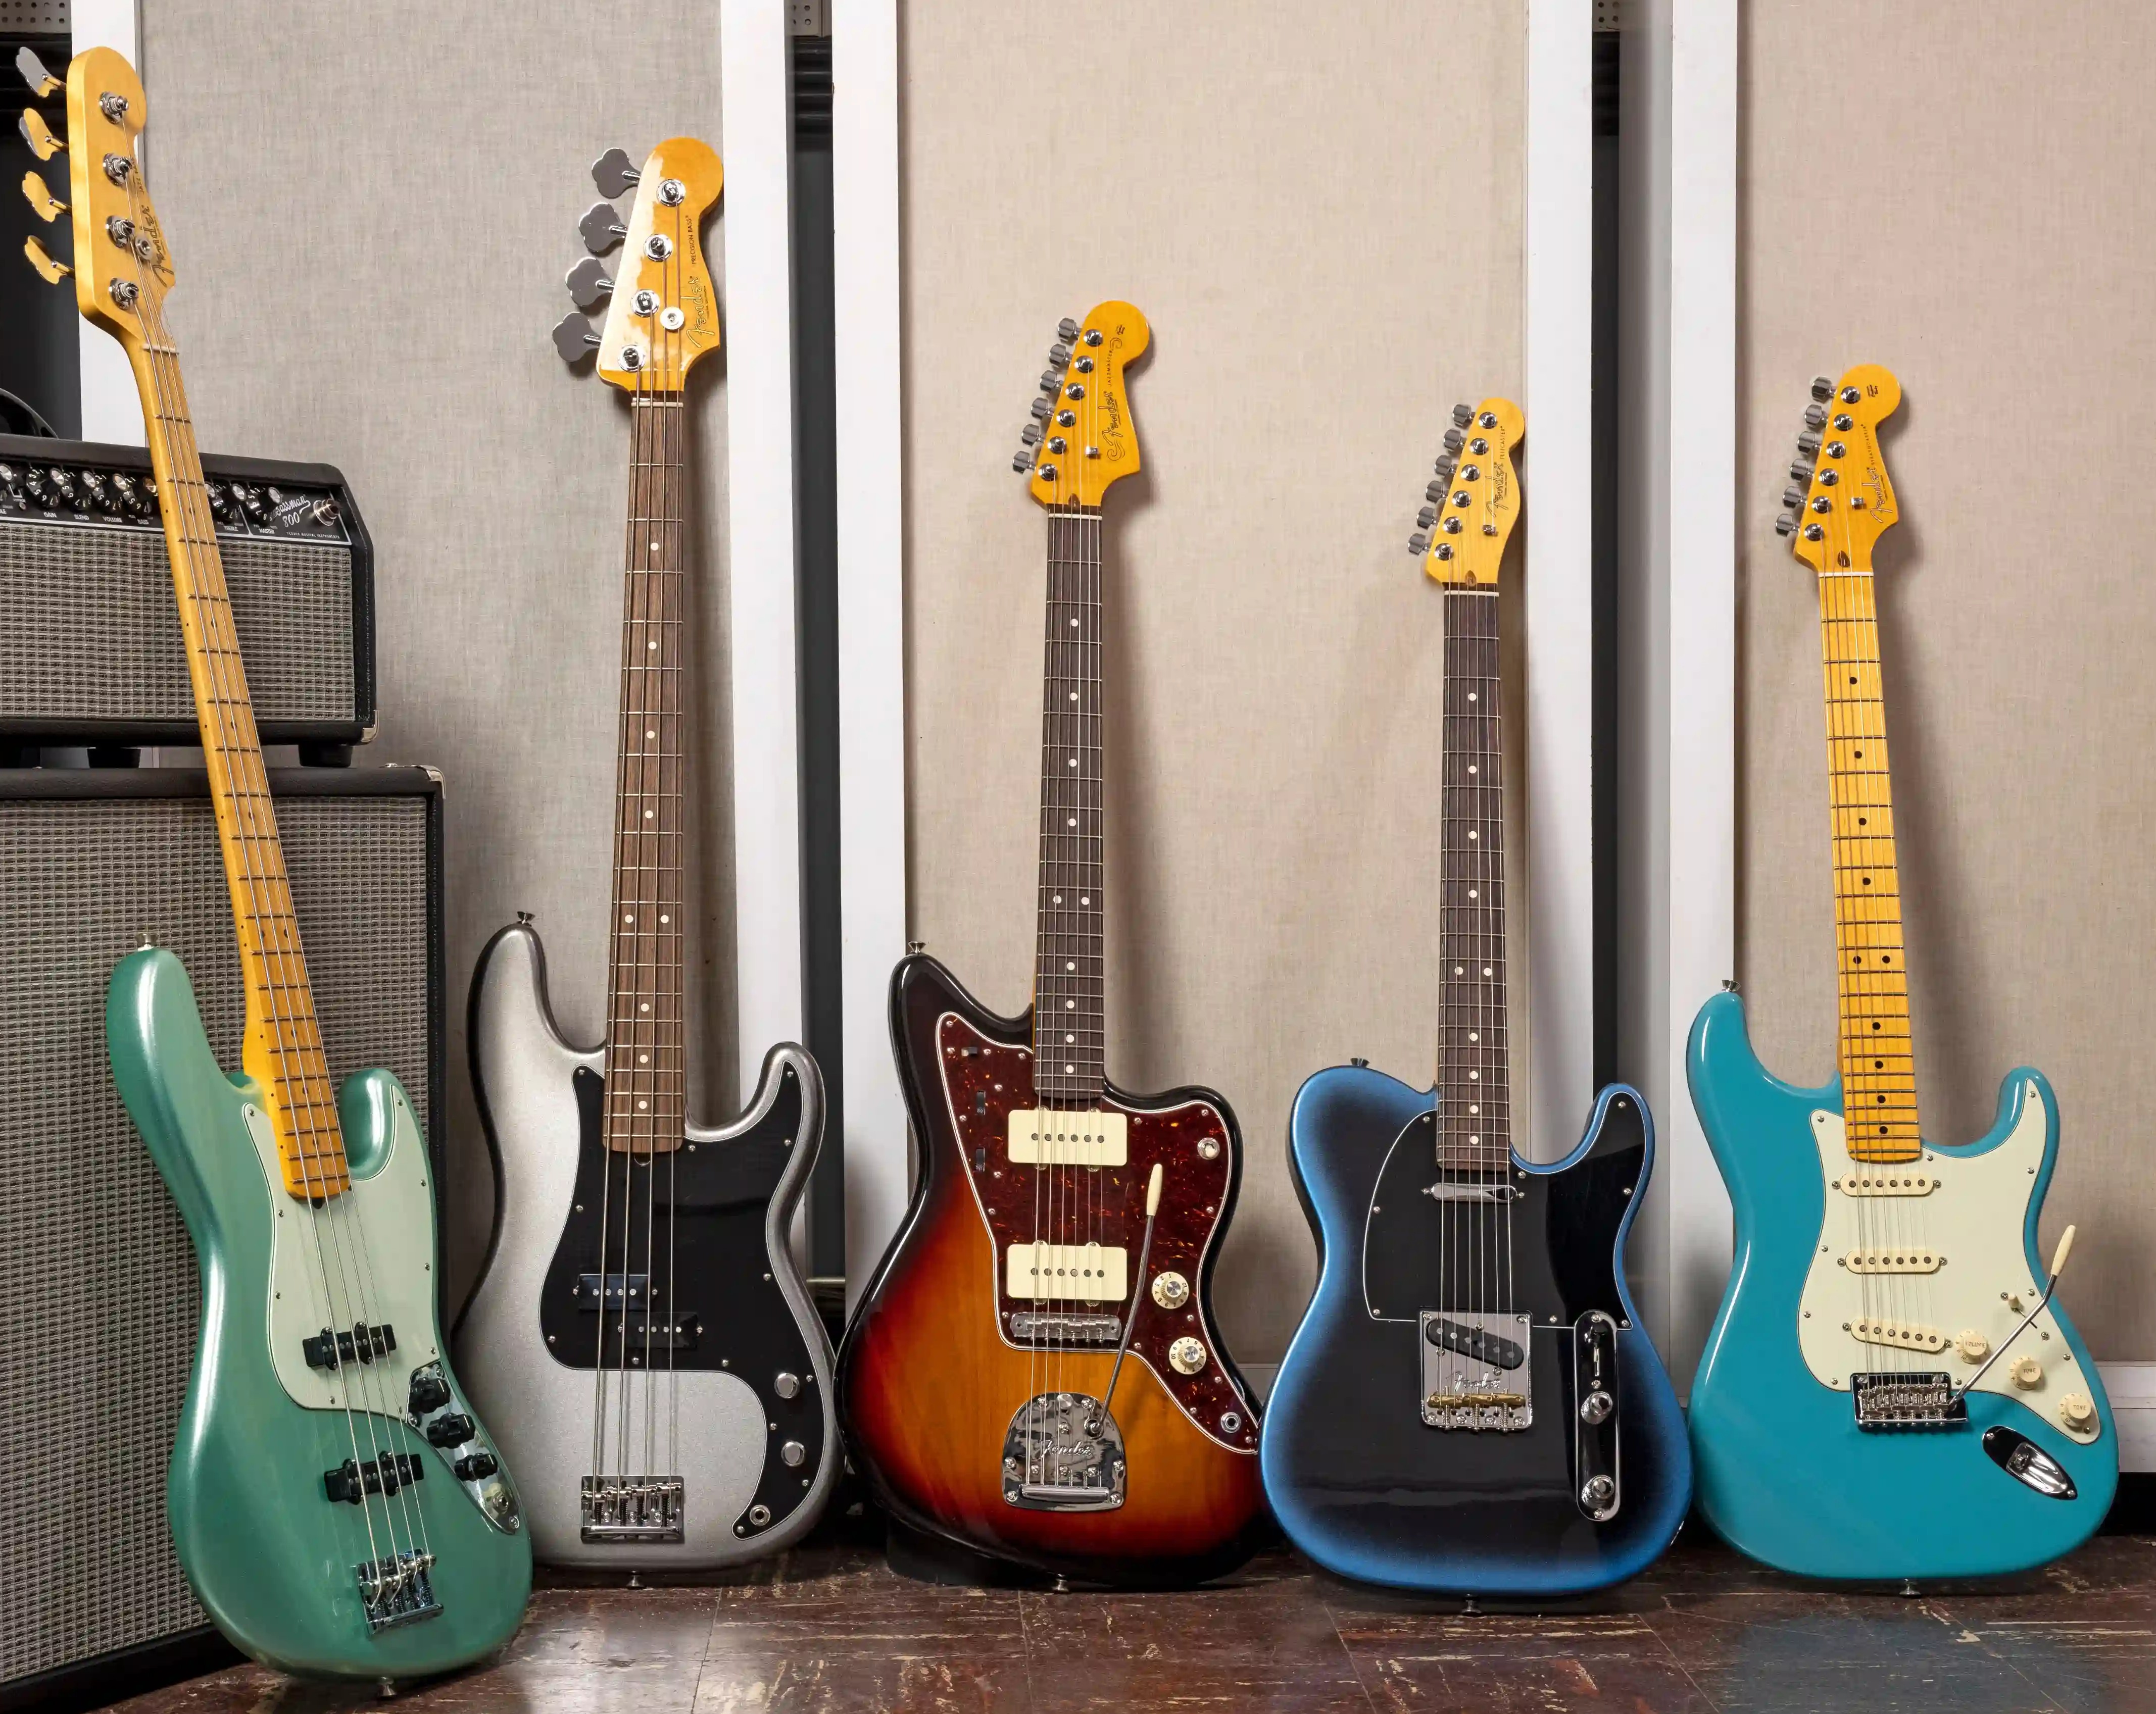
-------------------------------------------------
You have a choice of going to a recording studio and paying to have your songs recorded or you can record them yourself
at home, in your own home studio. With the price of recording gear coming down, the price to record in a studio has come
down from about $40. to $250. an hour 10 years ago to about $25. to $150. an hour today. The low end of the price range
being a small studio, usually in some-ones home. The higher price, a large studio operation or one known for recording
famous artists. The most popular and affordable device for home recordings through the 1960's and 70's was the two track
reel to reel recorder with a sound on sound function. Through the 80's and 90's it was the four track cassette recorder. The
cassette deck design made it extremely easy to use and to figure out how to record your own songs. It used a standard blank
cassette tape and had a record head capable of recording four separate tracks, one at a time. For instance you could record
a drum machine or drummer on track one. Rewind the tape and listen to the drums being played back while you record a bass
guitar part or whatever on track two. Play back the drums and bass while you record a guitar part on track three and then the
vocalist, would lay down the vocal track on track four. This process is called multitracking. Then you plug a RCA cable into the
master/line out of the four track and plug the other end of the cable into the line in of a regular two track home stereo
cassette deck, VCR, mini disk recorder, CD burner, computer, DVD recorder or whatever you have to mixdown the four tracks
to two tracks (stereo). The finished cassette, CD or whatever you mixed down to, could then be played on a regular cassette
deck. Voila, there was your finished demo tape, hopefully a hit song, ready to send out to a record label, in pursuit of the
infamous Record Deal.
Later on came the eight track cassette recorder with a $2000. plus price tag on it, which quickly became discontinued for
poor sales. Other short lived versions were the six track and twelve track cassette recorders. The four track cassette was
finally discontinued around 2009. Some music stores still had stock until 2011. It was a long slow death for the 4 track,
probably due to its low cost, around $150. to $200. at the end, the cheap cost of blank cassettes and how simple it was
to use. Just push a button to play, record, fast forward or rewind. In the late 90's the hard disk recorder which had been
around for several years started to come down in price and led the way as the popular method for home recording.
------------------------------------------------------------
NEW GUITAR EFFECT PEDALS
FOR LESS THAN $7.

------------------------------------------------------------
The hard disk recorder works the same as the 4 track cassette except it records on a computer type hard disk drive
mounted inside the case of the unit instead of on a cassette tape. You still needed another unit to mix down to.
Later on you could buy them with a built in CD burner. They have the advantage of no tape stretching or deterioration.
The built in mixing console allowed you to adjust EQ, panning, add reverb or delay and other effects. They also had a
built in mixing buss for effect sends. You could edit your songs, meaning you could cut and paste parts of a song just
like typing on a computer. You could play the verse and chorus of the song one time and repeat it by cutting and pasting.
Editing was a tremendous advantage, a task which reel to reel recorders and cassette recorders could not perform.
Later on the price dropped with the introduction of the cheaper flash card to replace the more expensive hard drive.
For the last few years computer recording has been the rave with the advent of lower cost high power computers,
cheap computer peripheral upgrades (such as hard-drives, RAM memory, etc) and software plugins. First recordings on
the computer were done through the mic input on the rear of the terminal. This created a lot of tape hiss style noise
and weak signal input. Then through the USB port bypassing the soundcard and those problems and then through
firewire which allowed more data down the pipe greatly reducing latency (delay) on recordings. There is a large selection
of pro recording software and plug-in modules software for effects, instruments, even bass and drum grooves played by
studio musicians, which you can use in your songs. At this point you might be asking yourself if you are still considered
to be a musician when using these pre-programmed bass and drum patterns, with the cutting and pasting and other
computer tricks, or are you more of a computer programmer. A lot of musicians have been asking that question lately.
Recently the price of hard disk recorders has crashed, probably due to the onslaught of cheap computer recording software
and plug ins. The hard disc recorder manufacturers have cut their lines to only a couple units. It looks as though they will
soon be discontinued like their cassette predecessor. If you are starting a studio from scratch and don't have a powerful
computer or a computer you can use for long periods of time , the hard disk recorder will be your least expensive option.
A used four track digital recorder starts at about $100., an eight track starts at about $200. Usually you can find a used
16 track for a few hundred dollars, 24 track around $400. and up, 32 track around $600. and up. If you have a suitable
computer and can tie it up for long periods of time, you can get in for under a $100.
Either way you will still need additional gear such as mics, instruments, cabling, effects etc.
by Art Rock / MyCD.ca
------------------------------------------------------------
-------------------------------
You have two 16 track multitrack recorders and would like to synchronize them together to
end up with a 32 track recording studio. This is a bonus feature, especially if you want to
double the number of simultaneous tracks available to record at the same time. On many
16 Track & 24 Track Recorders you can only record on 8 tracks at a time, simultaneously,
and that usually drops to 4 tracks at a time, if you record at the highest sampling rate.
By syncing two recorders together you can double the number of tracks you can record at
a time. Then when you go to do your .wav file, you can mix 32 tracks down to 2.
Synching usually can be done, especially if the recorders are the same make, although
I have done it in the past with three recorders of different makes and track numbers.
First you hook a MIDI cable from MIDI out of one recorder to MIDI in on the other. Then do it
again on the other two remaining midi ports, so you end up with a midi loop between the two
recorders, MIDI OUT to IN, IN to OUT.
Now pick which recorder is going to be the Master, usually the better unit. The other unit
will be the Slave. On different makes and models the settings can vary but usually are very
similar to the following. You can check the owners manual of each unit to see if they list it.
First we will set the Master Recorder. Press the "MIDI/SYNC" Button. After you hit the
"MIDI/SYNC" Button you should see "MIDI/MMC" tab or page. Then you should see "MIDI SYNC"
where you will select "MTC MASTER". Then set "MMC MODE" to "Receive". For "Device ID"
enter number "10" [you could choose another number if you wish]
[If you don't have a "MIDI/SYNC" button, press "System", then "SYNC", you should see a spot to
set "MTC MASTER". Then press "MMC" to select "Receive" and set device ID to "10"]
Then to set your Slave Recorder you will set the MIDI SYNC to "MTC SLAVE" and set the MMC
mode to "Transmit". Then set the device ID to the same number you set before, which was
"10" in this example.
The "CONTROL CHANGE" on the master is usually defaulted to Off, which enables MIDI
to control the mixer. If you turn "CONTROL CHANGE" on, you will transmit or receive mixer
control messages. I usually leave this at the default OFF.
Press PLAY on the Slave Recorder. The Slave Recorder will then send a MMC message to the
Master Recorder. The Master Recorder will receive the MMC message and start playing. It will
then send a MTC message to the Slave. The Slave will then sync to the master and begin
playing. It may take a few seconds to sync. Now the Recorders are synced together.
When you press Play, Rewind, Fast forward or Record on the Master the Slave will do the
same, the two recorders are locked together.
When you record your song, it is a good idea to wait a few seconds after the zero count,
after you hit record/play, to start playing your instrument, to give the units time to lock.
Otherwise you might cut off the first second or two of your song.
by Art Rock / MyCD.ca
-------------------------------------------------------------
------------------------------------------------------------------------------------------------------------------------
There is no tuning frequency that has more controversary surrounding it than the mystical 432Hz.
There are religious people that state that 432Hz tuning was used in Gregorian Chants by
Benedictine Monks a thousand years ago. 432Hz is one of the Holy Solfeggio
frequencies they used,
which consisted of 396 Hz, 417 Hz, 528 Hz, 639 Hz, 741 Hz, and 852 Hz.
Many Holistic Healing Practitioners will swear those frequencies will relax you,
heal your ailments,
give you everlasting peace and harmony with nature.
Then there are the Nazi conspiracy theories that the Nazi's were responsible for
leading the world
into the A440Hz tuning standard because their experiments found that 440Hz would cause anxiety
and mental anguish to disrupt the world. The funny part about this is that in Germany they
standardized A440 in 1834, over 50 years before Hitler was even born. Granted, Germany was still
called Prussia back then. And even more stranger than that is that Hertz is named after Heinrich
Rudolf Hertz, who was not even born until 1857. So they must of had some sort of correlation that
was a predecessor to the Hertz measurement. That correlation was Johann Heinrich Scheibler, the
same man who initiated the 440Hz recommendation in 1834. He designed and made a device called
the tonometer. It had 56 tuning forks used to measure pitch by counting acoustic beats. Kind of
sounds like cycles per second. Maybe Hertz's work was based on his work.
In a medical study of 432Hz vs 440Hz tuning in Italy, they found that 432Hz did
slightly lower blood
pressure, lower heart beat rates and improved respiratory rates when compared to 440 Hz. The test
group also said they enjoyed the same music more when listening to it at 432Hz tuning vs 440Hz.
Then you will hear the case that 432Hz resonates better with the human body, the
brain, nature and
mother earth. But neither frequency has a multiple of any of the frequencies of the human body or brain.
Neither falls into a multiple of the electromagnetic frequency of the Earth.
Does 432Hz sound different than 440Hz you ask?
To my ear it definitely does, especially on a distorted guitar through a chorus
effect. The high gain of
a strong overdrive or a distortion effect, combined with a chorus or flange effect, seems to accentuate
the difference. To me the A432Hz tuned guitar sounds like you added an enhancer and a reverb effect
to the guitar. When I added those two effects to a guitar tuned to A440Hz it sounded almost identical
to the 432Hz tuned guitar without those two effects.
I'm not sure why, although I suspect it has something to do with the lower
tuning making a larger
soundwave which sounds more resonant for some reason. Perhaps the slightly lower pitched high notes
are a little less harsh on our ears giving a more relaxed, peaceful
feeling?
Or perhaps the fact that they are not a multiple of, our eardrum frequency
range, which is 500Hz to
4,000Hz, maybe they are causing a quasi combing, detuned kind of effect. If so 432Hz is further away
from 500Hz, the bottom end, than the 440Hz, making a more dramatic effect.
Or maybe I'm wrong and their is a greater force, maybe Holy or maybe Sinister at
play???
by Art Rock / MyCD
---------------------------------------------------------------------
DOUG ROCKS HARD ROCK, PROG ROCK,
METAL & ALT ROCK SPOTIFY PLAYLIST

From 60's, 70's Deep Purple, Led Zeppelin, Black Sabbath,
Jethro Tull, Rush, to 80's, 90's , AC/DC, Metallica, Iron Maiden,
The Cult, Soundgarden, Tool to 2000's current, & new up &
coming artists not yet discovered . Playlist is at:
https://open.spotify.com/playlist/4FuwJjsoV2320LxfIeRhh8
To submit your original Rock song go to:
https://play.soundplate.com/doug640
--------------------------------------------------------------------
Thinking about sending your music to a mastering
house to have your song mastered, but are
not sure if it is worth the money. One way you can try to see if you would
consider sending
your music to someone else to master it is to take a look at the demos a lot of
mastering
houses post on their websites. Many of them will show you before and after
demos.
Some of them are very talented at their craft, but there are also a lot of them
where it
just seems like the the volume is louder on the after. You can do that too with
a compressor
which you probably have built in to your recorder or recording software. To
compare and
evaluate fairly take their demo pre master and find a volume number that matches
the level
of their post master demo. Now play them one after the other but raise the
volume of the
pre master and lower the volume of the post so that they are identical volumes
to compare
fairly. Do you hear a difference now?
Browse through the various mastering studios demos until you find one that says
to you
yeah I want that guy to master my songs. You may or may not find that guy.
There are also a number of mastering houses that will do a one or 2 minute
section of your
song for free to see if you like it and then you pay to have the whole song
done.
An excellent idea. Somebody putting their money where their mouth is. I would
still advise
you to check their demos first to avoid wasting your time and theirs.
There are also a number of AI driven, on line mastering sites, where you can
submit various
types of song files and they analyse it and give you the mastered song while you
wait.
It usually takes less than 5 minutes. If you like it, you give them your payment
and they
give you a copy you can download and submit to your music distributer. Some of
these on line
mastering services charge as low as $5. or $10. If you find the after version
they are giving
does not sound any better or even worse, which you will probably find, move on
to someone
else. Let your ears decide.
by Art Rock MyCD
INDEX
-----------------------------------------------------------------------------
by Art Rock MyCD
------------------------------------------------------------------
7] Music Production & Mixing Tips & Tricks by Ian Waugh
What makes a pro recording pro? What is the sound that pros get and how can you make your recordings sound more professional? The simple
answer is - there's no simple answer. But with careful listening and a little experience you can create excellent results with some modest equipment. Good
mixing starts ear The first and most important item of equipment is - who knows? Anyone? It's your ears! Sorry to tell you this, but listening to ten
hours of Rave at 110dB will do nothing for your ears may as well give your mix to a turtle to try to mix with misused ears. Listen to commercial
recordings of mixes you like, analyse them, listen to those mixes for the effects and get to know what constitutes the sort of sound you're after. Mixing secrets
There's no hidden secret to getting a good sound, but if we had to sum up the secret of mixing in two words it would be this - EQ and compression.
Okay thats three words. These are probably the two most important tools used by professional producers. However, like any tools, if you don't know
how to use them you'll be carving Habitat tables instead of Chippendale chairs. That's where your ears and experience come in. Here we have
assembled some production ideas, suggestions, tips and tricks but they can only be guidelines and need to be adapted to suit your material. There
are no presets you can switch in to make a bad recording sound good. And if your original material has been poorly recorded not even Abbey Road
could salvage your mix. But follow these suggestions and see how much your mixes improve. Get the level right You can't push the levels when
recording digitally as you can when recording to tape but you still want to get as much signal into the system as possible. This means watching the
levels very carefully for clipping, and recording at an even and constant level. Some recording software lets you monitor and set the input level from
within. Some expect you to use the soundcards mixer while others have no facility for internally adjusting the input level and expect you to set this at
source. Monitors Your ears are only as good as the monitors they listen to. DO NOT expect to produce a good, pro mix on tiny computer speakers.
----------------------------------------------------------------------
----------------------------------------------------------------------
It may sound fine on a computer system, but try it on a hi fi, in a disco and through a car stereo. Oddly enough, you don't necessarily need the most
expensive Mic. Many top artists use what some might call "average" Mics because they work well and get the job done. You can spend a wad on a
large diaphragm capacitor Mic (yes, they're good for vocals) if you have the lolly but check out dynamic Mics which are much more affordable and can
be turned to several tasks. Mixing MIDI and audio One of the great things about computer-based recording is that the parts can so easily be changed,
edited and processed. It's also so easy to combine MIDI and audio tracks and many musicians use a combination of sample loops, MIDI parts and
audio recording. Audio recordings are generally guitar and acoustic instruments such as the sax and vocals. Incidentally, the best way to record
guitars is by sticking a Mic in front of its speakers. You can DI them and process them later and this may be cleaner but for a natural guitar sound a
Miced amp is hard to beat. It's not necessary to record drums live and, in fact, it's difficult to do and retain a modern sound. You can buy off-the-
shelf MIDI drum riffs and audio drum loops, or program your own. The quality of the gear which makes drum noises these days is such that anyone
with a good riff can sound like a pro.
----------------------------------------------------------------------

----------------------------------------------------------------------
Mixing MIDI As MIDI and audio parts appear on the same screen in modern sequencers, it's very easy to arrange them into a song. However, when you
come to mix everything down there's another consideration. If you are recording to DAT you can simply route the audio and MIDI outputs through a
mixer and into the DAT machine. However, if you want to create a CD you must first convert the MIDI parts to audio data. The entire song can then be
mixed to hard disk and burned to CD. Converting MIDI to audio can have another benefit and that's the ability to process the MIDI tracks using digital
effects. Effects There are three positions for effects known as Master, Send and Insert. Use the Master for effects you want to apply to the entire mix.
These will often be EQ, compression and reverb. Although giving each channel its own Insert effects is kinda neat, each one uses a corresponding
amount of CPU power. So if your computer is struggling and if you're using the same effect on more than one channel, make the effect a Send effect
and route those channels to it. Many pieces of software let you apply an effect Pre or Post fader. With Post fader, the amount of sound sent to the
effect is controlled by the fader. With Pre fader, the total volume level of the signal is sent. Post fader is the usual default and the one you'll use the
most. EQ E.Q. is the most popular and the most over used effect. Yes, it can be used to try to "fix a mix" but you can't make a silk purse out of a
sow's ear as me Grandma used to say and what she didn't know about mixing could be written in the margin of the book of honest politicians. But
before you start messing with E.Q. or any other effect for that matter, make sure you have a decent set of speakers. Have we said that already? Oh,
must be important, then. There are plug-in effects such as MaxxBass which can psycho acoustically enhance the bass frequencies to make it sound
better on smaller speakers. However, this is by no means the same as getting a good bass sound in the first place by observing good recording
principles.
----------------------------------------------------------------
MICROPHONE ISOLATION SHIELD UNDER $20.
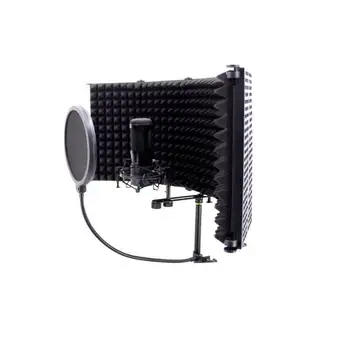
----------------------------------------------------------------------
EQ can enhance a mix to add gloss, fairy dust, shimmer, sheen, a sweetener or whatever you want to call it to the final production. It can
be done with enhancers and spectralisers, too, although these tend to mess with the harmonics which some producers don't like. However, don't
dismiss them out of hand. General EQ lore says that you should cut rather than boost. If a sound is topheavy, the temptation is to boost the mid and
bass ranges. But then what usually happens is you start boosting the upper range to compensate and you simply end up boosting everything and
you're back where you started - only louder! The reason why cutting is preferred is that boosting also boosts the noise in the signal which is not what
you want. Try it. Boost every frequency and listen to the result. If you think it sounds okay, fine. What do we know? But when you're fiddling, do keep
an eye on the output meter. Boosting EQ inevitably means increasing the gain and it's so-o-o-o easy to clip the output causing distortion which does
not sound good. Finally, check EQ changes to single tracks while playing back the entire piece. In other words, listen to the tracks in context with all
the other tracks. It may sound fine in isolation but some frequencies may overlap onto other tracks making the piece frequency rich in some places
and frequency poor in others. Reverb Reverb creates space. It gives the impression that a sound was recorded in a hall or canyon instead of the
broom cupboard. Recording lore suggests that you record everything dry, with no reverb, so you can experiment with a choice later on. You can't un-
reverb a track once it's been recorded. The more reverb you apply, the further away sound will seem. To make a vocal up-front, use only enough
reverb to take away the dryness. Vocals don't want to be mushy (lyrics can be mushy) so use a bright reverb. A common novice error is to swamp
everything with different types of reverb. Don't - it sounds horrible! Mixing down You've done all the recordings, done the edits, applied the effects and
now it's time to mix everything into a Big Number One Hit! Before you do, go home and have a good night's sleep. Have two. In fact, sleep for a week.
Yes, we know you're hot and raring to go but your ears are tired. They're falling asleep. Listen carefully and you might hear then snore! There is a
phenomenon known as ear fatigue and consistent exposure to sound, especially the same frequencies, makes our ears less responsive to them. Goes
back to the bit about spending your life in a Rave club - you'll never be a master producer. If you try to mix after spending a day arranging, your ears
will not be as responsive, so do them and your mix a favour by waiting at least a day. Now, go forth and mix! And dont forget - you get better with
practice. For more information about mixing, pick up a FREE copy of Creating The Perfect Mix at making-music .com
written by Ian Waugh
-----------------------------------------------------------------------
 $
$
$
$
-----------------------------------------------------
8] Studio Singing & Vocal Technique By Tom Gauger
As a singer, one of the biggest allies in your singing career will be your ability to perform well and do it with consistency in the studio. As a
professional singer myself singing on FOX TV, UPN Station ID's, O'Charley's and many others, as well as a former talent booking agent with the
William Morris Agency, I can tell you that one of the biggest downfalls to most singers is their inability to be consistent with a broad range of singing
styles while singing in the studio. It's one thing to sit behind the piano with friends, and an entirely different thing to sing behind the mic in the studio
where every nuance and tonal inflection is heard. So how do studio singers who've been doing this professionally for years, get to that point of
consistency, and how do they get the paying gigs and get called on in the first place? Those are great questions, and I will take the remaining time in
this article to capitalize on concepts that most singers would likely embrace as the truth and realistic in answering them. To begin with, singing in the
studio and singing live in front of a crowd are two totally separate singing techniques and usually unequaled levels of singing expertise. It's one thing
to sing in front of a crowd where audibility of your vocals is not the main concern, but the overall groove and image is. Understanding the words on
stage may or may not be a concern, but to the studio and session singer, it's everything. You see there are marked differences in the ways that each
of these singers takes their singing ability to the stage. You will find that many if not most singers don't do both well. The singer who is great on
stage in front of a large audience is usually not that convincing or lyrics that easily understood in the studio. That's why jingle singers are paid such
good money. It's not easy to sing a commercial full throttle and not sound "ricky ticky" doing it with words that are easily understood. And as a side
note, if you are interested in singing commercials, you might consider visiting ReelMusician.com for more information and download a free e-book on
jingle singing. So how do session singers get that consistency in the studio? Well, years of experience are one answer, but the other part of the answer
is in how they practice. How serious are you in your dream of becoming a studio singer? In your desires to becoming a studio singer, you must
commit to consistency, be easy to work with, and available. You might already have availability and easy to work with in the bag, but you're still
having problems with the consistency part. Let's look at a few ideas that might help. Finding a good vocal coach, that truly understands studio and
jingle singing, is hard to find. Most, have preconceived notions and teaching ideas and attribute everything to a breathing technique of some kind. I'll
tell you the truth. I've met fantastic singers who breathe in a number of different styles, yet they are consistent as the day is long.

Now I'm not
suggesting that there aren't better or proper breathing techniques out there, I am suggesting that many if not most vocal teachers, teach from a
textbook style and not from a "I'm going to figure out your strengths and abilities and zero in on a workable and credible game plan that outlines a
singing technique career pathway for longevity," style. There's a big difference. The teacher who teaches out of a textbook and the teacher who is
already been out there with success under their belt, no matter what business or job, has my attention and certainly should have yours. Find a
credible and reputable singing coach. You will want to practice your singing in the shower, the car and even in a closet or close up to a wall where you
can hear what you're singing. Ultimately, being able to record your voice, even onto a cheap cassette or into the computer to hear your progress or
areas that you immediately recognize needing improvement, is the best way to go. This alone, if you take time out on a regular basis, will improve
your singing far beyond what most vocal coaches can or claim they can do. Because of your vested interest and now your ability to hear and figure
out what needs to be changed and corrected, will be the igniting factor in your singing career and goals of consistency. Certainly don't ignore or reject
the notion of finding a qualified vocal coach, but understand that America was founded on entreprenualism and not the textbook way of doing things
and this includes your singing career as well. A good vocal coach will recognize and ultimately push you in the right direction as well by hearing and
giving you exercises to correct singing deficiencies. Get connected with session singers, and perhaps even try to take vocal coaching lessons from one
of them. You will have to flexible as their session work will not always be easy to predict, but well worth any inconvenience. This will increase your
odds of obtaining session work, and now you will be working with an individual, like we just mentioned, who is actively in the business and so pure
textbook teaching will most likely not be in their philosophy and thinking. Lastly, and I apologize and wish we had more time in this article, maintain
a good attitude and an easy to deal with personality. Singers and producers like individuals who are not only fun, but they're easy to deal with and
who always come to the session with an uplifting spirit. You may visit ReelMusician .com for more articles and advice on this and other topics.
written by Tom Gauger
About the Author Mr Gauger is a former talent booking agent with the William Morris Agency and jingle singer singing on FOX TV, UPN Station ID's,
O'Charley's and many others. In addition, Mr Gauger is a TV and radio writer and can be contacted at reelmusician.com or tgauger@ reelmusician.com
-------------------------------------------------------------------------------------------------
| STUDIO MICS SALE AT AMAZON |
-------------------------------------------------------------------
-------------------------------------------------------------------------------------
EFFECT PEDAL SHORT CORDS UNDER $7.
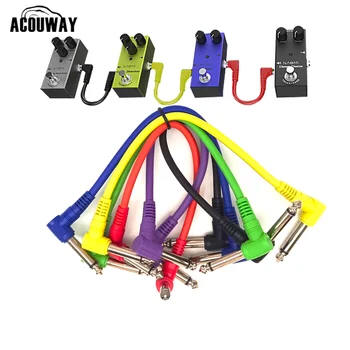
----------------------------------------------------------------------
GUITAR EFFECT PEDAL SALE AT AMAZON
As an Amazon Associate I earn from qualifying purchases
--------------------------------------------------------------------------
9] Preparing For Your Recording Session by John McKay
Recording is a time-intensive experience, and problems that arise often seem magnified. No one wants to wait for an hour while the guitar player
runs to Guitar Center for new strings. So, to keep things going smoothly and efficiently, here are some things to do in preparation:
1. Practice! You'd be surprised how many bands come into the studio obviously unprepared. If you can't play through the song without making
mistakes, then you're not ready to record yet. Take the time to practice the songs you want to track thoroughly. This isn't to say that you can't be
creative in the studio, but it's a lot cheaper to be creative on your own time.
2. Make sure your songs are finished. Going into the studio hoping to finish lyrics or parts on the spot is a recipe for dissatisfaction. You may be
inspired by the pressure, but you'll inevitably listen back to it later on and think that you could have sang it better, or that you don't especially like
this line or that phrase.
3. Record yourselves. It's very useful to record your practice using a simple tape recorder. The finished product won't sound very good, but you'll be
able to hear if you're off time, or off key. It may also make you aware that some parts of your song are dragging, or that other parts could be
extended or more developed.

4. Get your gear in shape. Don't show up for a session that you're paying for with gear that doesn't work, cables that cut out, batteries that are going
dead, or blown speakers. If you're afraid that your gear is less than perfect, make some calls. You engineer can point you to some people in town that
rent gear on a day-by-day basis, or to other musicians who might be willing to loan an amp or cabinet for a day or two. It makes a difference!
5. Tune your instrument. Drummers should put on new heads about 1 week before the session. The snare head should be replaced immediately
before the session, and if you're doing more than one or two songs, consider bringing extra snare heads. Nothing sounds as good on tape as a fresh
snare head. Guitarists should put a new set of strings on a few days before the session. Bring extra strings, as you probably will break one or two.
Bass players can replace their strings, although new bass strings can be a bit overly metallic. I recommend changing bass strings a week or two before
the session.
6. Let people know you're busy! You don't want to be called in to work half-way through your session. Everyone involved needs to clear their
schedules. Nothing creates more tension in a session than someone wanting to blow out early so they can hit some party. Also, if you're recording at
your home, make sure your family knows about it. Take phones off the hook, recording will require some degree of quiet. If you're working at your
practice space, make sure the neighbors know that you'll need some quiet, if there are other bands at your facility, ask them for their schedules, and
work out a time when they won't be playing in the next room.
7. Have a plan. It's always better to have fewer songs to finish, and to know precisely which songs you're trying to get done. Often, once a session
gets rolling, it's easy to just go ahead and track some of the other songs you have. While this isn't terrible, in my experience these tracks are usually
discarded, as they haven't been thoroughly practiced, and may not even be complete.
8. Develop a vision. I like to come see a band before I record them, just to get a feel for their sound, and develop my vision for the session. If you
envision your record sounding like the latest MTV hit, you may be frustrated and disappointed. Your band is unique, and my goal as an engineer is to
find what's best about your band and accent that. Your record may not sound like anything that's come before, and trying to cram it into a pre-
existing notion of a "good recording" doesn't do it justice. The Pixies didn't sound like anything that came before them, nor does Modest Mouse, or
the Beatles, for that matter.
9. Relax! Recording is fun, and there's really no pressure. Just be prepared, and you'll have a smooth, enjoyable session with a great product at the end!
About the Author John McKay is the owner of Suitcase Recording, in Phoenix, AZ.
---------------------------------------------------------------------------
|
Win Free Meds FancyMeds |
------------------------------------------------------------
10] Tips for a Great Recording Session by Richard Dolmat
You know your songs are great and so does your girl/boyfriend, family, pets etc, and you finally decided to record an album in a real studio. That's
great! But what actually happens when you get there? When you finally do pick the perfect studio, one that you feel comfortable at, there is a certain
routine that must be followed in order to get the best performance and the best recording for your budget.
1. Tune Your Instruments. This also includes your drums and any tuneable percussion instruments you may have. There is absolutely nothing worse in
the world than to have a perfectly written song with a perfect performance be ruined because someone didn't take an extra 2 minutes to check their
tuning. Tuning takes a few minutes; a recording lasts forever.
2. Be Well Rehearsed. You'll be surprised how many bands suffer shock when they get the final recording bill. The main reason for this is because
they confuse rehearsal time with recording time. Rehearse at home, in the garage, at your uncle's house; anywhere but at the recording session. When
you arrive at the studio, you should know your songs inside-out and be ready for the red light.
NEW GUITAR EFFECTS UNDER $10.

3. Practice with a Click Track. A lot of drummers aren't able to play with a click track. Make sure yours can. A click track is essential in getting a good
basic rhythm track that the rest of the band can lock in to, and to sync-up loops and delay times.
4. Be Early. Many studios start charging their clients from the exact time agreed to in the contract. Just because you decide to show up late, doesn't
mean that the studio should give up that time for free. Be early and be ready to go.
5. Get the Sound Right. Never, ever try to "fix it in the mix". It doesn't work like that. Take an extra few minutes to tweak the sound before recording
it. Turn that knob, tighten that string, have another sip of water. Remember again, tweaking may take an extra minute, but the recording will last
forever.
6. Know When To Quit. Recording often leads to diminishing returns. Spending 20 hours in a row at the recording session isn't going to make your
song twice as good as spending 10 hours. This rule also applies to mixing. If you're tired, call the session and come back the next day fresh and
ready.
7. Record Alone. Don't bring your friends, family, parents or anyone else into your sessions. As fun as it may be, you are there to do a job and record
the best music possible. If you are a millionaire, then by all means, have a party at the studio, but don't count on getting anything done.
8. Mix and Match. After letting the engineer do the first rough mix alone (which he should) do an A/B comparison of your mix to some of your
favourite CDs. Remember that the production CDs you are listening to have already been mastered. But it's a good way to compare levels and
panning.
9. Bring Spares. Always bring spare strings, drum heads, bass strings, water bottles, throat lozenges, etc to a session. You'll always need the one thing
you forgot to bring, so bring it all and leave them at the studio until your recordings are finished.
10. Have Fun! This is THE most important point of all. Creating and recording music isn't rocket science. Although there is a science involved, you
should let the engineer worry about that. If you're not having fun, then you're in the wrong business!
2004 Richard Dolmat (Digital Sound Magic) About The Author Richard Dolmat is owner, engineer and producer for the Vancouver based recording
studio Digital Sound Magic. Visit his site a digitalsoundmagic .com
 $
$
$
$
-----------------------------------------------------

-------------------------------------------------------------------------------
------------------------------------------------------------------------------
11] The 5 Most Common Questions About Music Mastering by masteringcentral .com
Music mastering is an essential part of every hit record. Yet, few new (and even some established) musicians have a good understanding of what
mastering is and why they need it. This often leads to many selecting the wrong mastering studio and making many unnecessary mistakes in the
recording and music mixing phases (which affects the mastering later on). This is why below are the 5 most frequently asked questions about music
mastering:
1. What exactly is music mastering? Mastering is the final phase before your CDs, Vinyls, DVDs or MP3 files are produced. Its the last chance to get
the sound right and for errors to be fixed. Mastering transforms your music from a raw sound into a professional, radio-ready sound. It gives your
tracks punch, loudness, clarity, and completes your final vision.
2. Why is it so important and do I really need it? All major labels have their artists records mastered before theyre released. But, often many
independent artists/labels wonder if they should go-ahead and get it done. The answer is a big YES! If you want to make the right impression, then at
a minimum you need to get your demo professionally mastered.
----------------------------------------------------------------------
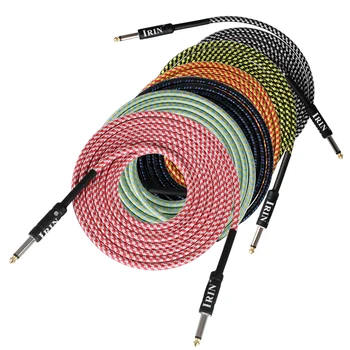
3m 10' CORD UNDER $7.
----------------------------------------------------------------------
Because just think about when your demo hits the A & R managers desk, whats
going to stand-out the professionally mastered demos (yours) or the poor quality ones? By having your music mastered, then youre going to increase
your chances of getting signed and creating loyal fans. Moreover, the single biggest advantage professional mastering offers are the fresh skilled and
independent ears put to your music. Because after working on your music for long hours in the studio, you often become too close to your work. And,
as a result, your ears cant help but get used to mistakes. Your ears begin to hear mistakes as normal. Its the same effect as when you are living near
a heavy-traffic street - after living their for a few weeks, you will not wake-up anymore at night because your ears get used to those sounds and
blends them out. With the mastering engineers help, you make sure you don't have any major errors in your music and gain advice from an
experienced professional in what needs to be done to help get the perfect sound!
3. How much should I pay? Mastering studios charge a wide range of fees. You can pay anywhere from $5 a track or up to hundreds of dollars per
hour for the most well-known engineers. The reason there's such a large amount of fees is that there are many budget studios that have arisen
online. These studios are often a single person who does all his or her work on the home computer. Since these people usually do not have much
experience, they often miss important problems and do not know what to look for (every track has its own unique problems). Additionally, they do not
have tools a professional mastering studio offers to do it right. This is compared to the more expensive engineers who have years of experience and
know-how in creating a hit sound.

4. How important is the mastering equipment? Professional mastering studios spend thousands of dollars on their equipment. The equipment gives
them full flexibility in making a wide-range of adjustments. However, when looking at the equipment a studio has, you should not focus too much on
it. Instead, and more important, you want to look for an engineer who also has experience with it. It takes years for an engineer to feel fully
comfortable with all Myment and the adjustment it allows. This is especially true when learning how to adjust for different genres of music.
For example, the equipment is often used differently for Rock music than Classical.
5. Should I use an online or offline mastering studio? Online mastering is a recent phenomenon. It has only been in the last few years that it has
really begun to take off. There are now hundreds of different people offering mastering services via the internet. Many of these people are amateurs
(and can actually make you music sound worse). While, at the same time, some of the most famous and well-known engineers have now moved
online. Online mastering offers many advantages over offline stuo get a hold of the engineer to share your ideas. Moreover, an online mastering
engineer has experience with more international music. In offline studios, the engineer often only works with a certain type of music that is popular in
the area. Musicians! Get the edge by giving your tracks the "Big label" sound with professional mastering! Get the full scoop on what mastering is, why
you need it, and where to get it without getting ripped off by visiting masteringcentral .com right now!


----------------------------------------------------------------
More free articles on these pages - PICK A TOPIC
![]() [
[
![]() ]
]
![]()
![]()
![]()
![]()
![]()
The page you are on is shown in brackets. [ Recording ]
JUST
RELEASED
Any prices displayed were the price at the time the ad was placed, subject to change. If you click on the ad you will see the current discounted price.
As an Amazon Associate I earn from qualifying purchases
copyright MyCD.Absolute Music 2006, 2011, 2012, 2013, 2014 ,2020, 2021, 2022, 2023, 2024, 2025, 2026 All rights reserved
Privacy Policy
We do not utilize cookies or collect any data on anyone visiting our site, although
your personal internet provider, your browser, your social media
accounts, google, any sites or ads you clicked on, probably will and may follow
you to, and through our site, as well as every
other site you visit, as well as any ads you click on.
We do not ask for or collect any information on our site visitors.
Contact web @ MyCD.ca